
Save vegetable seeds for next year
Trending
Many of the vegetables we grow in our gardens produce seeds, which, if harvested and stored correctly, have the potential to grace us with free plants. And late summer is the perfect time to start collecting them.
A few notes: Make sure the plants from which you're collecting seeds are heirloom, or open-pollinated, varieties. These are plants in their original forms whose seeds will produce plants with the same qualities as their parent.
Hybridized varieties, on the other hand, are created by breeding two or more different types to capture the best qualities of each. Attempting to grow seeds collected from hybrids will yield a harvest of disappointment, as the resulting plants will not have the expected attributes but rather carry the traits of only one of the parents — and there's no way to know what that will be. For this reason, it's best not to grow seeds from supermarket produce.
Many plants become cross-pollinated in the garden when pollinators, other insects, animals and wind transfer pollen from one plant to another. To ensure the seeds you collect will grow into plants that match their parent, different varieties of the same crop should be kept anywhere from 100 feet to a mile apart, depending on climate, weather and other variables. This is often impractical, if not impossible, in the home garden.
To avoid cross-pollination surprises, plant only one variety of the category of plants from which you plan to harvest seeds. If you want to save tomato seeds, for example, grow only one type of tomato in your garden.
If that feels too limiting, go ahead and experiment, knowing that even if cross-pollinated, both parents are heirloom varieties you selected and planted. They'll probably be fine even if they're not what you expect.
Store all seeds in a cool, dry place in a covered glass jar or paper envelope away from ripening fruit, which would affect seed germination. The temporary addition of a silica gel packet to the jar will remove any remaining moisture, but take it out after a couple of days to avoid over-drying.
Here's how to collect and save seeds from the most common homegrown crops.
————–
LETTUCE
At the end of the growing season, lettuce will bolt, or send up a flower stalk that will develop seed heads reminiscent of dandelion puffs. When the puffs are dry, remove the entire stem, place it into a paper bag, fold over the top and shake. The seeds will disengage from the flower and fall to the bottom of the bag.
————–
PARSLEY
Parsley is a biennial plant with a two-year life cycle that produces only edible foliage in its first year and leaves and flowers in its second. Allow those flowers to remain on second-year plants until they become brown and brittle. Cut them off the plant and store them in a paper bag to dry completely for a couple of weeks. When you remove them from the bag, rub the flowers between your fingers to separate the seeds, then blow away the lightweight dry plant matter and discard.
————–
BASIL
Basil seeds are tiny, so separating them from the small flower petals and chaff can be tedious. When plants bolt at the end of the season, allow flowers to remain until they fade completely. Clip them off and place them in a mesh sieve or colander, then use your fingers to rub them against the bottom of the sieve.
————–
BEETS AND CARROTS
These biennial plants produce seeds only in their second year, after a period of vernalization, or cold storage. In areas with cold winters, simply leave plants in the ground over winter.
In warm climates, you'll have to create "winter" indoors: At the end of the first season, cut the foliage down to 2 inches, carefully dig up roots, and store them in a refrigerator or cool cellar over winter. Replant them outdoors the following spring.
When the leaves of second-year beet plants turn brown, remove the seed stalk from the top of the plant and place it in a paper bag. Store in a cool, dry place for at least two weeks, then give the bag a good shake to separate the seeds. Pour them onto a plate, then blow on them to separate the chaff.
Allow second-year carrot flowers to dry on the plant, clip them off, and dry them further in a paper bag for a week or two. Shake the bag well and pour seeds out onto a plate, blow on them to separate the chaff.
————–
PEPPERS
Select the nicest-looking pepper from your healthiest plant and allow it to remain on the plant until it is overripe and wrinkled. Slice it in half and remove the seeds, discarding any that are discolored or otherwise undesirable. Spread seeds in a single layer on paper towels and allow them to dry in a warm spot away from direct sunlight. Toss the seeds occasionally to ensure even drying, which should take about a week.
————–
EGGPLANTS
Allow an eggplant to over-ripen on the plant until it becomes hard and wrinkled, and loses its shine and color. Slice it open, remove its seeds and place them in a bowl of water. Agitate the water with your hands to separate seeds from any flesh that is adhered to them. Strain, then pat seeds dry with a towel and spread on a towel or screen to dry, tossing every day for up to a month until completely dry.
————–
GREEN BEANS
Because green beans produce an ongoing harvest throughout the season, enjoy the first flush or two, then leave developing pods on one plant until they are completely dried and brown. You'll know they're ready when they play like maracas. Cut the pods off the plant, place them in a cool, dark spot to dry further, then remove the seeds. Discard any that appear discolored or damaged, and spread the rest on a towel for a few days to harden.
————–
TOMATO
There are two ways to save tomato seeds -- the right way and the easy way. Full disclosure: I like it easy, and I've succeeded with the shortcut. Your results may vary.
Start by cutting a tomato in half, then squeeze out its seeds and pulp over a bowl.
Fermentation improves germination rates and kills some seed-borne pathogens that could sicken plants. To ferment seeds:
1. Place a cover slightly askew over the bowl and allow the seeds to sit in their juices undisturbed for three days.
2. Pour the bowl's contents, which may be covered with a white film, into a larger container and add water equal to at least 3 times the seeds' volume.
3. Agitate the water with your hand and pour off the liquid. You'll notice that most of the seeds will have sunk to the bottom of the container; they are the viable seeds.
Any that float are duds, so pour them out with the juice, pulp and water. Repeat the rinsing process two more times.
To make sure pathogens are killed, soak seeds for 30 minutes in a 90% water, 10% bleach solution, then rinse very well. Spread seeds on a towel and allow to dry for about a week, tossing occasionally.
Or, you can simply allow the whole mess of seeds and pulp to dry on a plate in the open air for about a week, then scrape or pick off the seeds.
————–
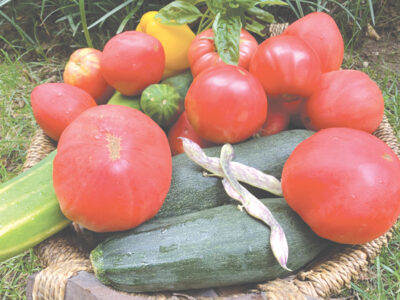
This Aug. 12, 2020, image provided by Jessica Damiano shows a harvest of homegrown vegetables in Glen Head, N.Y. (Jessica Damiano via AP)
ZUCCHINI
Allow your chosen fruit to become overgrown, wrinkled and dry on the plant. Remove it, slice it open and scoop out its seeds. If desired, follow the tomato fermentation process above. You'll need to add a bit of water to the first step because there won't be any juice or pulp in the container.
Jessica Damiano writes regular gardening columns for The Associated Press. Her Gardening Calendar was named a winner in the 2021 Garden Communicators International Media Awards. Her Weekly Dirt Newsletter won a Society of Professional Journalists PCLI 2021 Media Award. Sign up here for weekly gardening tips and advice.